Showing posts with label floral. Show all posts

Friday, October 24, 2014

[Nail Art] Chevron Floral


Hi everyone! :) Today I have a short nail art post for you. I started this mani with something much simpler and sweeter in mind, but I went a little crazy with the water decals. Now it's a bit more flamboyant. LOL. Hope you still like it. :)


What I Used
China Glaze In A Lily Bit
Milani Black Swift


Monday, July 28, 2014

[Nail Art] Tie-Dye Floral


Hello!♥ I have a quick nail art post today. I actually wasn't going to post it, because it didn't turn out the way I imagined. But I love the colors anyway, so here's my nail art fail. Haha. Those tie-dye looking blotches are supposed to be flowers if you couldn't tell. :P


Polishes Used
Milani Mint Crush
Milani Peri-Wink
Milani Rainbow Prisms (glitter)
All 4 OPI Sheer Tints
Milani Nail Art Striper in White Canvas


I think I'll give this another try on a darker base. Some better planning with the flowers should yield better results. ^^

Until next time!

Liz

Sunday, February 9, 2014

[Nail-Art-A-Go-Go] Day 8: Still Life


Hi everyone! We're officially into week 2 of the nail art challenge. It's getting more complicated, but exciting as well. For day 8, we had to incorporate still life into our nail art. Initially I was going to do a bowl of fruit, but I ended up painting a peony. Haha, I know it's another flower design. I guess I'm on a bit of a floral kick right now. :)

Saturday, February 8, 2014

[Nail-Art-A-Go-Go] Day 7: Primary


Hi guys! For day 7, we had to incorporate primary colors into our nail art. Originally, I was going to do a tape mani, but instead I did another floral. This mani actually makes me nostalgic, and I realized it reminded me of illustrations in a children's book from a looong time ago. :)

Friday, February 7, 2014

[Nail-Art-A-Go-Go] Day 5: Contrast


Day 5! I'm still behind, but I'm catching up. I have day 6 and 7 pictures, but I still have to edit them. If I can get them up by later today, I'll be up to date. :) For day 5's theme, I used contrasting colors, yellow and purple, to create this floral design.

Wednesday, November 14, 2012

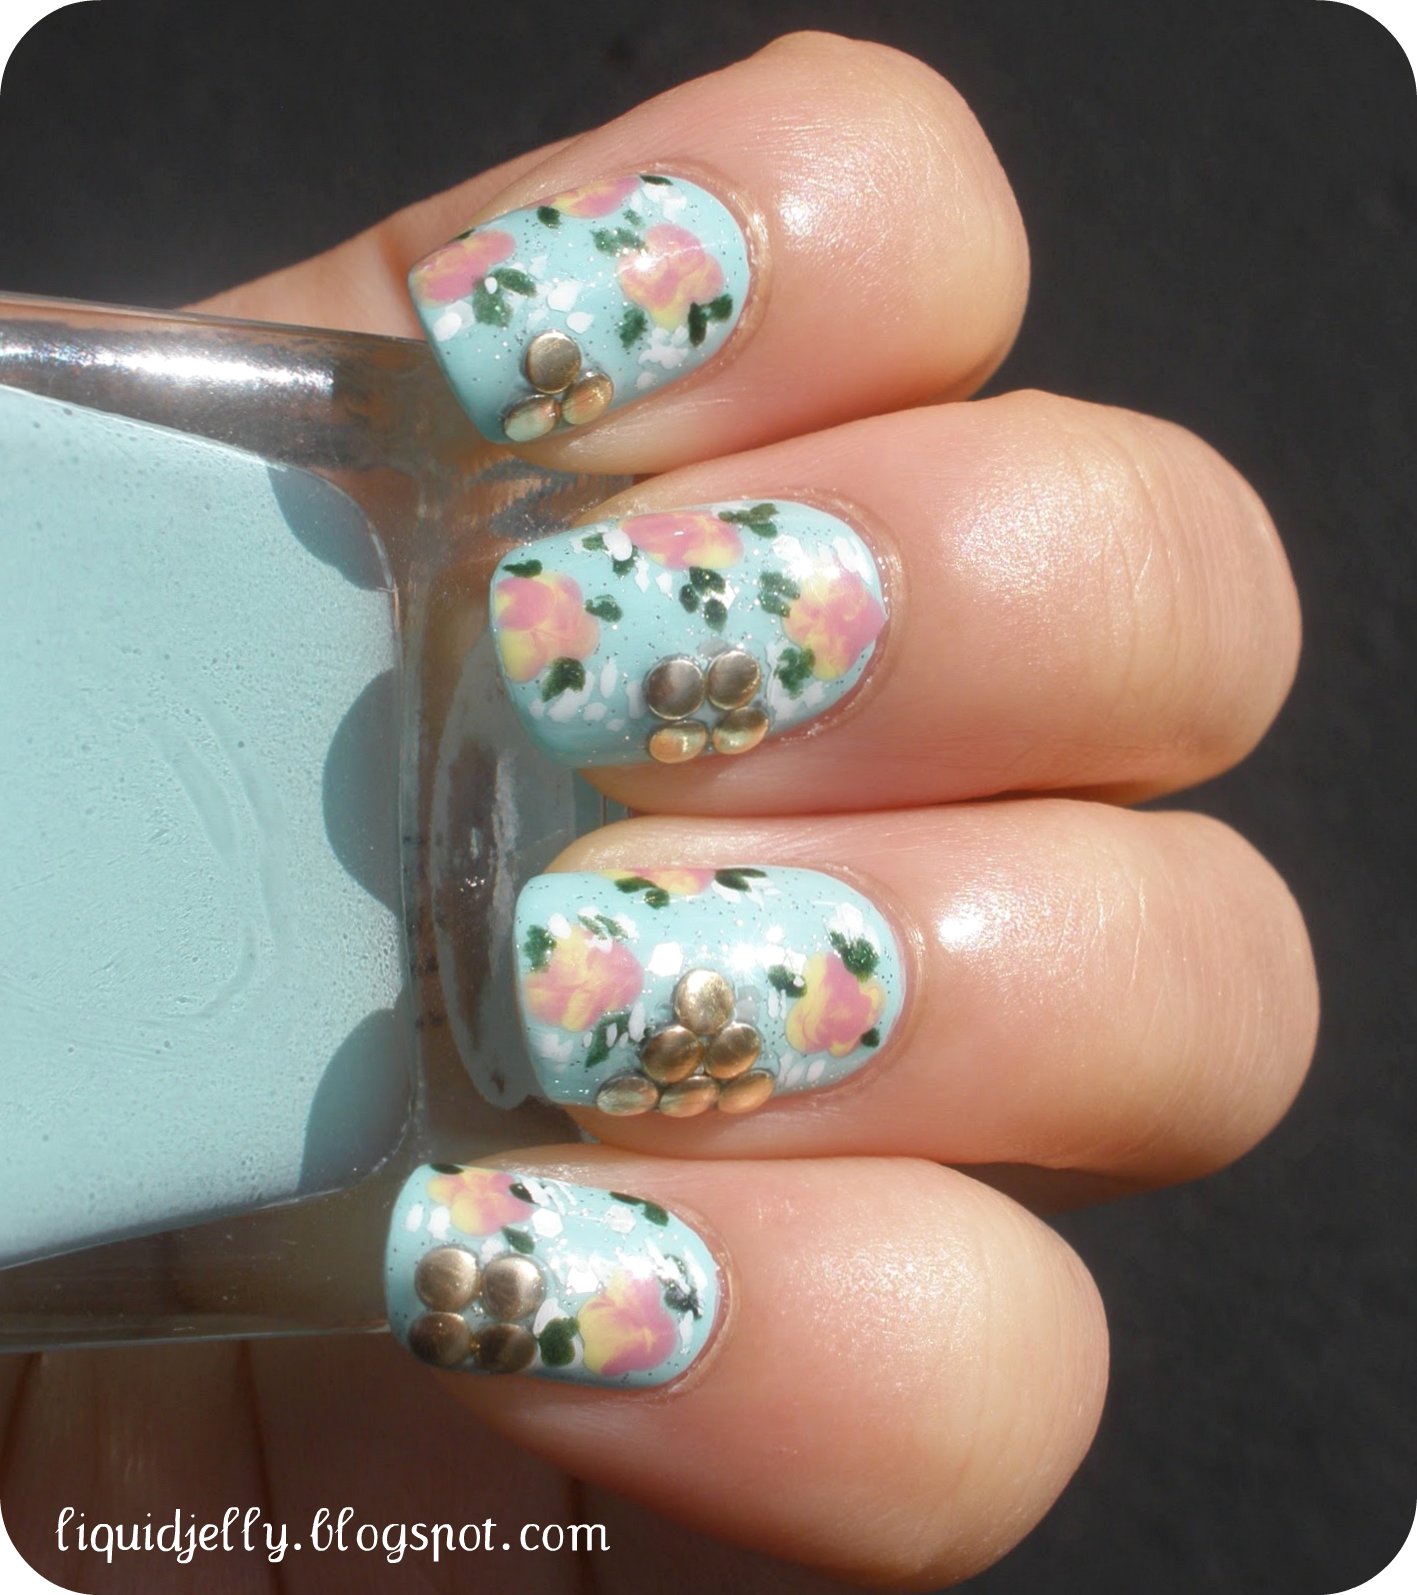
Floral Nail Art with BPS Studs


Hi all!  I know we're approaching winter, but I really wanted to do some floral nails.  So here they are.  I think this is my best set of floral nails yet.  And I just realized I always use a mint base color... I should change it up.  But this time I added studs!  Exciting, right?


For this look, I used Urban Outfitters Smush as the base color.  Then I layered one coat of OPI Don't Touch My Tutu! and Pirouette My Whistle over it to soften the mint.  For the flowers, I used OPI Sparrow Me The Drama and Dr.'s Remedy Youthful Yellow.  (Here's a tutorial on how to do the flowers.)  The leaves were done with Revlon Rain Forest.  I also added a spray of white flowers by dotting on Milani White On The Spot.  No tools were required for this look besides a bobby pin. :)
 

As for the studs, the ones I used are the 2mm round gold studs* from Born Pretty Store.  They come in the bag shown above, and as you can see, there are a lot of studs in there.  I actually love these studs a lot.  I prefer them over rhinestones and they don't lose their luster or bleed when topped with top coat.  They're also much flatter than rhinestones, so they don't come off easily or trigger the 'picking' instinct in me.  I already have a few other (more season relevant) designs in mind, so you'll be seeing these studs again. :P

You can find the studs on BPS for $5.90, and they carry a lot of other studs in different shapes and colors as well.  You can also use my code F10X31 to get 10% off your total! :)


That's it for today!  What do you think of this look?  Do you ever feel like wearing seasonally inappropriate nail art? -.-


Liz 
*The studs reviewed in this post were sent to me for my honest review.
Affiliate links are indicated with an * sign.
Please view my Disclosure Policy for more info.

Monday, June 4, 2012

Faded Florals ♥


Hey all!  Yesterday, I decided to give The Beauty Department's faded florals mani a whirl.  I used their tutorial to make the faded florals, but added my own touch to it by adding leaves.  I also used similar colors instead of all different ones. 

The colors I used for my version shown above are:
Victoria's Secret Cocktail (base color for non white nails)
OPI Don't Touch My Tutu! (white base color)
Sephora by OPI Caliente Coral (florals)
SinfulColors Island Coral (florals)
Julep Niecy (florals)
China Glaze Starboard (leaves)
OPI Pirouette My Whistle (glitter)

Instead of using a creme white base, I chose a sheer white to get a softer look.  On the none floral nails, I also added diluted white and pink, then topped it with OPI PMW.  I actually like the above version better in my pictures, but on me I didn't.  So I took off the non floral nails and revised them to get the look below:


In this version, I used OPI DTMT! topped with China Glaze White Cap for my non floral nails.  I also added a coat of OPI PMW on the floral nails.  By the way, White Cap looks nice layered over any of the OPI NYC Ballet colors.  I originally got the idea to do this after seeing a bottle of Revlon Calla Lily.  I liked how it looked, but resolved not to get it.  From looking at it, I knew I could achieve the bottle color with two polishes I already owned. :)

This was my first attempt at Rebecca Likes Nails's watercolor technique.  It could be better, but I think it turned out alright.  I still want to attempt this faded floral look again with cooler colors and smaller florals.  Hopefully I'll get the hang of diluting the colors out more like Rebecca.  I haven't done an all over watercolor look like hers either!  It's definitely on my to-do list!

What do you think?  Do you like the first version or the second one?  I'd love to hear your thoughts! :)


Liz

Friday, December 23, 2011

Winter Mani: Tweed & Roses

Hey all,

I probably should get my holiday manis posted, but I wanted to share this winter mani I did with you first.  I think I'm going to compile my holiday looks into one post and post it tonight.  So be on the lookout for that one!  Here's the winter look I did with tweed and roses. :)


Read on to see more!

Wednesday, August 31, 2011

Roses and Pearls

Hey all!  Sorry about the lack of posts these days.  I really thought things would slow down during the second week of school, but I am still as busy as ever. T_T  However, I will try to post more regularly.

Today I have a nail art I did for my back-to-school mani.  For my base I used my franken, Susie's Cup of Tea, and layered a coat of China Glaze Sea Spray over it.  Then I added white dots (pearls) and hand painted the red roses.  This was my first attempt at drawing roses.  I think it's okay, but I could definitely use some more practice.  Once I perfect my method, I will post a tutorial for those who would like one. :)  Also, please be sure to click 'read more' to see more pics of this mani and read my latest updates and reminders. ^^


Monday, June 27, 2011

Theme Monday: (Floral) Overboard & Tutorial

Hey all~

Today's post is for Facebook group Polish-aholics Anonymous!  Every Monday there is a new theme and today's is floral.  Makes me look forward to Mondays. :)