Showing posts with label BYS. Show all posts

Saturday, June 18, 2011

BYS Wonderland Collection

Minus one.  I got two out of the three in a swap with Ame of GiMiKd Girl!

L to R: Down the Rabbit Hole, Through the Looking Glass
Down the Rabbit Hole is a black jelly base with tons of holographic micro glitter.  This one is really gorgeous in the sun and super sparkly!  I think this was opaque in 3 coats.

Through the Looking Glass has a clear base filled with blue and yellow micro glitter.  This one's apparently a close dupe to OPI's Absolutely Alice.  I think the difference was that Through the Looking Glass had less yellow glitter, which is a shame because it would be perfect with a bit more yellow glitter!  For some reason while I was swatching this, I was determined to get it opaque.  5 coats later it wasn't anywhere near opaque, but I didn't want to take pics of my stained nails.  I noticed China Glaze Blue Iguana is a similar blue to the glitter in here, so I did one coat over the glitter, then another coat of TTLG.  The result?  Amazing!  The blue is a perfect match and you need only one coat as a base.  It actually makes it just look like it's opaque from the blue glitter, not like it has a jelly base.  So I was pleased.  I suggest doing one coat Blue Iguana, than 2-3 coats TTLG. :)

Sunday, May 29, 2011

NOTD: Rain, Rain, Go Away

It hasn't been that sunny these past few days, so I haven't really been swatching much.  My pictures don't come out that great unless I have plenty of natural lighting. :/  Today was no exception.  It's dark and gloomy out and earlier there was a crazy downpour of rain.  In hopes of sunnier days, I did a mani that I hope would appeal to the weather gods. :P


I wanted to do an ombre mani, but didn't have enough similar blues.  So I tried my best to lighten some colors with glitter. :P  See how the sky and clouds "gradually" get lighter. :)  On my pinky I drew a nice summery sun.  On my ring finger (third from the right), I used BYS Color Change Royal Blue.  It's actually really nice because it changes lighter or darker, so depending on my temp it gives the ombre a different transition in color.  My favorite is when it's darker toward the tips, cause then it's like the sky is turning lighter...quite literally.

With flash
Here's a complete list of polishes I used for this mani: China Glaze First Mate, BYS Color Change Royal Blue, Essie Coat Azure, Sally Hansen Gray by Gray, Revlon Cloud, Revlon Sheer Cotton, Hard Candy Hick, Sinful Colors Hottie, SC Unicorn, LA Colors Wave Length, Milani Nail Art white.  If you look closely in the flash pic, you might notice a very subtle pink shimmer.  That's from Hard Candy Hick, which I'll review once it gets sunnier.

Hopefully you guys are experiencing better weather!  Max and I are so ready for some more sun.

That window needs some cleaning...

Liz

--
PS. Check out this nice giveaway! :)

Beauty Fulfilled's Blog Birthday- Kaushal's giving away a lot of goodies like nail polish and make-up!

Tuesday, May 17, 2011

BYS Jaded Jet

Jaded Jet is dark green, almost black in some lightings, with emerald shimmer and tiny silver glitter.  I saw swatches of this online somewhere and thought it looked gorgeous.  It was a little different in person, but it's still pretty.  Since it's so dark though, I think it's better suited for fall and winter.  I don't know why but this strikes me as being more of a fall color.  I think it'd go well with a brown leather jacket. :)

This is 3 coats, but 2 coats would've been fine, and I didn't have any problems with drying time or application.  Sorry about the weird shines going on in these pics.  Hopefully I'll get some better shots next time I wear this. 


I knew I could do short posts! :)


Liz

BYS Color Change Part 2: The Brights

I'm currently wearing Royal Blue!  I was actually going to take it off after snapping some pics to swatch my other polishes, but I liked it so much I'm leaving it on. :P  Royal blue cerulean blue.  This one shows the least amount of difference between warm and cold out of the four I have.  You can pretty much tell by the sticker.  It is more noticeable in person, than in the pictures.  I'm wearing 4 coats here for maximum coverage.

Cold
Warm (almost)
Sorry about the little mishap on the ring finger.  My Seche Vite has been giving me some grief lately with bubbles.  It's also a bit thick.  Does anyone know if I can just add polish thinner to it like a regular polish?  I swiped the bubbles off with the brush and added a second coat of Seche Vite.  Unfortunately it didn't get rid of the swipe mark, but it did make the color extra shiny. :)


This color was also a bit hard to capture.  It's a bit more darker and cerulean than the picture shows.  The pictures are pretty close though.  I don't think I had problems with drying time with this one.  However, adding more coats means it will take more for the color to change.  With two coats, the change is more immediate, but it'll be sheer and uneven.


cold
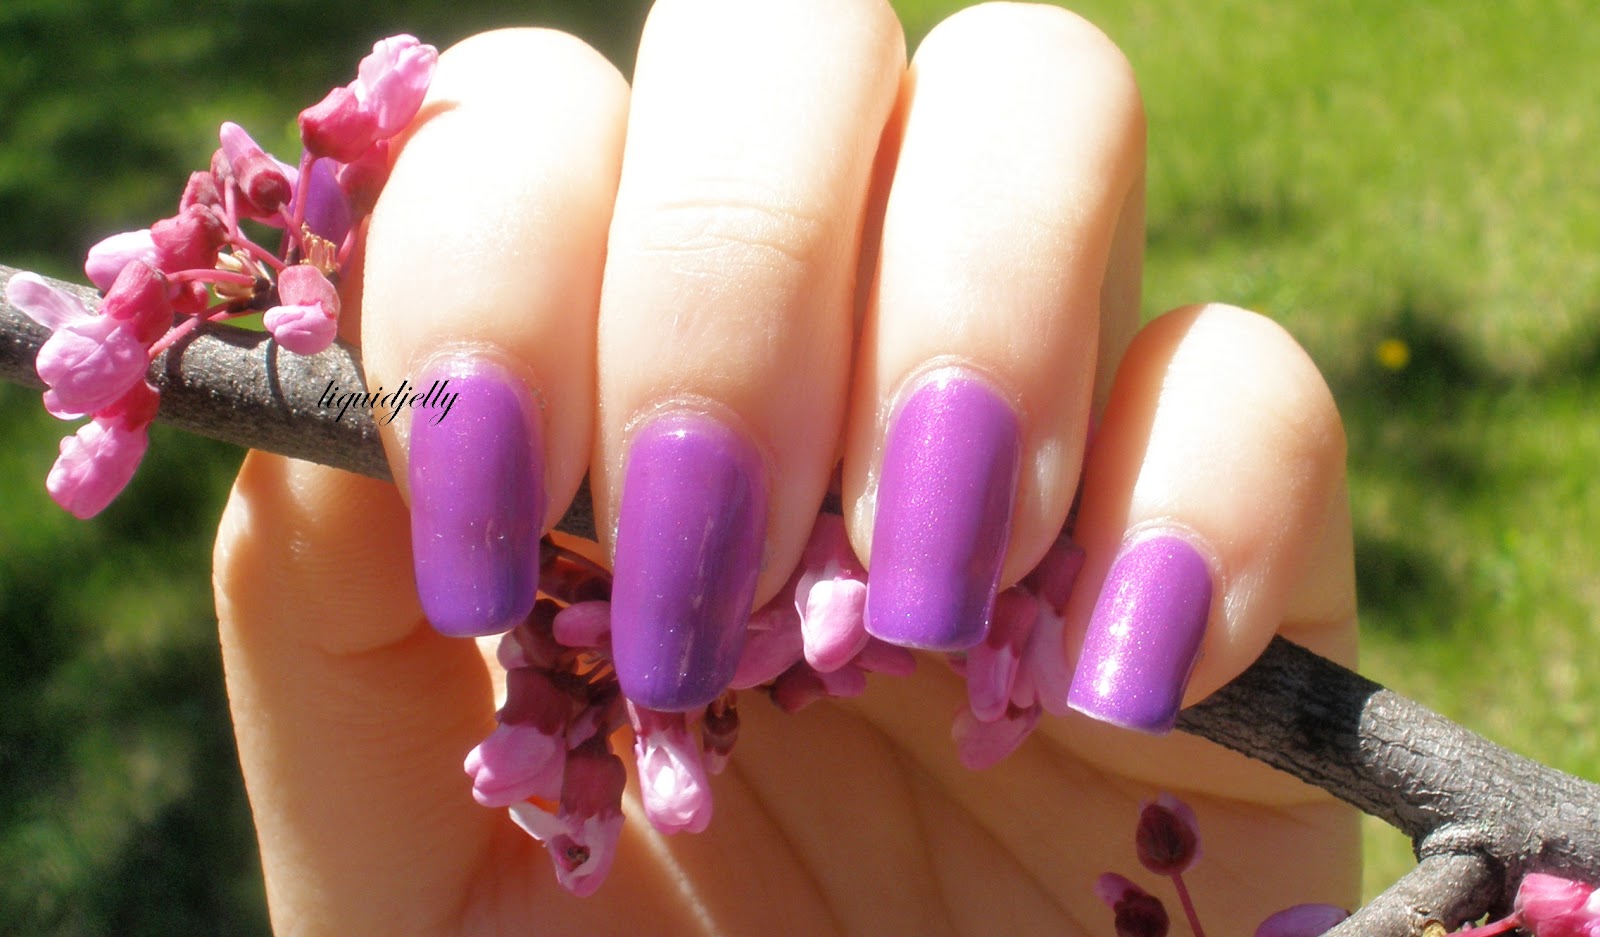
 This is Bright Purple!  I wore this one all day yesterday and is clearly my favorite from the bunch.  This one takes a while to dry, but I love love love the colors on this one.  Especially when it's pink!  Which is saying a lot because I'm not really a pink person. :P  3 coats here.  Sorry about tip wear, I swear I covered them.  :/


Now that I don't have to travel down 7 stories to take pics outside, I'll be taking more pictures outside in direct sunlight.  Rather than at the window like I've been doing.  The trees at home were blossoming with flowers, so I took some pics with them. :)  And a pic of the color change:

purple (cold) and pink (warm)
Is it not absolutely gorgeous?  I adore this pink!  It kind of reminds me of the pictures I've seen of Cult Nails Devious Nature, which I really really really want.  But may not be able to get. *sigh*

Overall, I really enjoyed these polishes.  There wasn't one color I didn't like.  Bright Purple was my favorite, followed by Royal Blue.  I'm just partial to bright bold colors.  In terms of color change, the purple were the most obvious.  I'll definitely be wearing these a lot, especially when it gets warmer. :)

Thanks again to Ame who sent me these. :)


Liz

Monday, May 16, 2011

BYS Color Change Part 1: The Glitters

This is my first time trying BYS, so I was super excited, especially since they change color!  I know Claire's has mood polishes as well, but for some reason I wasn't inclined to buy them when I saw them in store.  I believe BYS polishes are only sold in Australia and New Zealand.

Here are the glitters from the four BYS Color Change polishes I got in a recent swap.  I'll show you the two non glitters tomorrow. :)

cold
This is 3 coats of Glitter Purple.  I didn't notice in person, but it does still look a bit sheer in the picture.  In person I thought it covered well and evenly with the third coat.  These are a little tricky to apply, since they go on dark.  I noticed they turn more sheer when they turn into the light warm color.  This picture shows it cold and below you can see it when it's warm.

Warm
My fingers were cold, so I had to run them under warm water.  As you can see the tips were turning back to purple.  These polishes are so fun especially if you have long nails!  Look below.  It makes an easy french, which is how I like it. :)  I really loved this color combo.  The colors were so soft and pretty.


This next one is Glitter Blue.  Since the color change is between two shades of blue, the change is a little less noticeable than Glitter Purple.  But I definitely did see noticeable difference.  This one reminded me of an early morning sky.  I think it'd look superb with a cute flower print sundress.

cold
warm (light) and cold (dark tips)
somewhere in between
I don't have a warm pic of this one, but you can clearly see the difference between warm and cold in the second pic.  I also noticed this was sheerer than Glitter Purple when it turned warm.   I would recommend at least 4 coats for this one.  I don't know if it was because it was because it was sheer, but the color also seemed to dry less evenly.  I also had trouble with drying time.  Even after an hour and Seche Vite this wasn't completely dry.  I know because one of my fingers pressed into some laundry I was carrying up and it created a wrinkle!  Otherwise, I enjoyed the colors on this one as well.

All of these pictures were taken with top coat.  These dry matte, so I highly recommend a top coat.  Since they dry a bit slow, they easily dent- so a top coat is a must.

I can't wait to show you the second part, since it has my favorite from the four!  You'll have to come back tomorrow to see which one it is. :)


Until then,

Liz